Categorizing Time
This topic provides general information about creating, managing, and using tags and work types in TMetric. Here, you will also learn the difference between them.
Tags are used to categorize your working time. For example, if you work on a complex task that includes several minor sub-tasks, you can add tags denoting the specific sub-tasks you've been working on.
Work type is an extended type of tag, which can be utilized to improve project management. Work types are used in the time tracking process to mark a certain type of work you perform for your client. They come either with a billable rate or without it. Work types allow users to have multiple billable rates per project or make some project tasks non-billable if needed.
Tags
Tags can be created, edited, and deleted only by the account’s Administrator or Owner.
Besides projects, it is also possible to add a tag to an internal task. When tracking time, the tags will be copied to a time entry.
Managing Tags
-
In the Workspace drop-down list, choose Tags.
-
Click New Tag and enter the desired tag in the highlighted empty field.
-
Press ‘Enter’ or click the tag name you just wrote.
-
To edit a tag, double-click the tag name, type in a new name, and press Enter.
-
To delete a tag, click the menu button next to the tag name, click Delete and confirm the deletion.
![]()
Adding tags on the fly
The Allow creating tags on the fly option is enabled by default in the workspace settings. When you work with external systems such as Trello, Asana, Jira, GitHub, GitLab, Pivotal Tracker, etc., the TMetric extension pulls tags from external tasks and creates them in your TMetric workspace. If this option is disabled, then these external tags are mapped to the existing tags in your TMetric workspace instead.
Using Tags
Tags are added to a time entry as extra information. Time entry tags may be used later to filter data in a report.
You can attach a tag to a time entry using the time entry editor. Click the Select Tags field and choose one or more required tags.
Moreover, the Allow creating tags on the fly option lets you create tags directly in the time entry’s editor window. This option can be disabled in the workspace settings.
![]()
Work Types
You can add several tags, but only one work type to a time entry. Only the workspace Owner or Administrator have permission to create, edit and delete work types.
Work types can be created, edited, or deleted on the Tags page the same way as tags. Since work types are used separately from billing, there is a possibility to set a billable rate for a work type or skip it if a work type is non-billable.
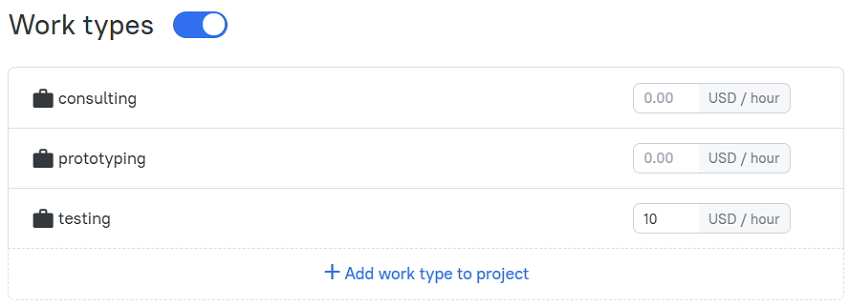
Using Work Types in Projects
You can use work types in any project either billable or non-billable. When creating or editing a project, the Work types section is always available for a user. You can enable or disable the section whenever needed.
When a new project is created, all the work types existing in the workspace are added to it. You can delete or add as many work types as you need.

When billing a project by Work type rate, the section turns on automatically (if it was off) and you can set hourly rates for each specific work type in the editor.
Default Work Types
A default work type is a primary work activity of a person. The workspace owner or admin can assign a default work type for a member in a workspace.
Specific work types can be attached to each team member according to this person’s role. For example, software developers would get a coding work type as a default one, while QA engineers would get testing.
![]()
Once selected, this default work type will then be automatically assigned (unless overridden) to every time entry logged by the corresponding person from this point on.
Tags and work types in reports
Tags and work types are visible in the Tasks Summary and Detailed reports. They can be seen displayed next to tasks.
When preparing a report, you can filter tasks by tags or work types. Click the Tag filter and select the necessary tag(s) or work type(s) from the drop-down list. Then click Apply Filter.
Didn’t find what you were looking for?
If you didn't find what you were looking for, you can make a support request or email us to [email protected]. We'll be glad to help you personally.