Azure DevOps Time Tracking Integration in One Click
TMetric makes Azure DevOps time tracking effortless with one-click timers on every work item. Log accurate hours, manage billable rates, and generate detailed reports to keep projects on time and profitable.
Add Timer Button to Azure DevOps Services Work Item
Complete these three simple steps to enable time tracking in Azure DevOps Services.
It takes no more than 3 minutes to set up.
Browser add-on for TMetric that allows one-click time tracking for popular Web apps
Now login to your Azure DevOps Services account and start tracking

Features
One-Click Timer in Azure Boards
- Timer button is integrated into each Azure DevOps Services work item
- It takes a single click to start the timer
- No need to stop before switching to another work item

Backlinks to Azure DevOps Services from TMetric
- Each time entry contains a backlink to an Azure DevOps Services work item
- Azure DevOps projects are mapped to TMetric projects

Accurate Reports & Billing
- See the time of your team in one place
- Group, sort, and filter reports
- Export Azure DevOps time reports and invoice your clients

Better Team Productivity Tracking
- Track who is working on which tasks, see active timers, and monitor progress across projects
- Access detailed reports and analytics to identify productivity trends and bottlenecks
- Desktop, browser, and mobile apps ensure every team member’s hours are logged accurately, even on the go

Data-driven Project Management
- Capture precise time spent on each task or project, providing a reliable foundation for project analysis
- Track billable vs. non-billable hours and compare against project budgets to optimize costs and profitability
- Compare team or individual productivity over time to optimize processes and improve efficiency

How to track time in Azure DevOps with TMetric
1. Locate timer button on an Azure DevOps Services work item
On the Backlog tab, select a required work item. A dialog window opens where you can view and edit the contents of the work item. You will see the Start timer button next to the title of the work item.
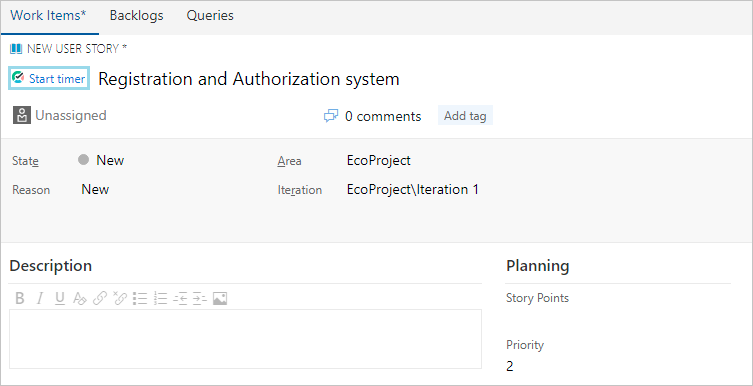
2. Start timer on a work item
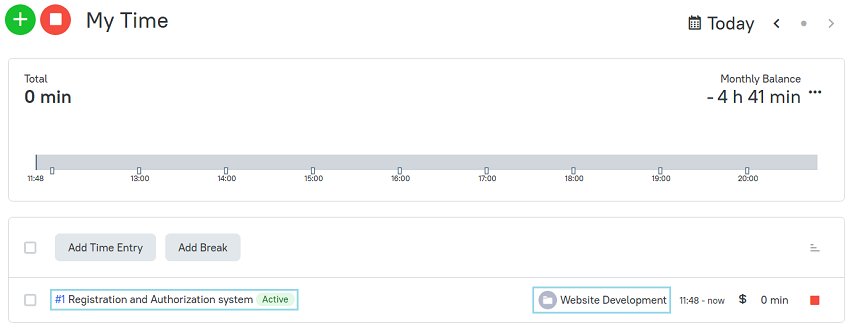
Click the Start timer button and TMetric will start recording your Azure DevOps Services working time. Notice that the Start timer button changes to the Stop timer button and displays the time spent on the work item.
If you are the workspace owner or assigned admin in TMetric and start the timer for the first time, TMetric pulls out from Azure DevOps Services and adds to your TMetric workspace:
- work item name
- work item ID
- project name
The corresponding time entry appears on the Time page in the TMetric web app. You can easily navigate back to the Azure DevOps Services work item simply by clicking the link icon next to the task name.
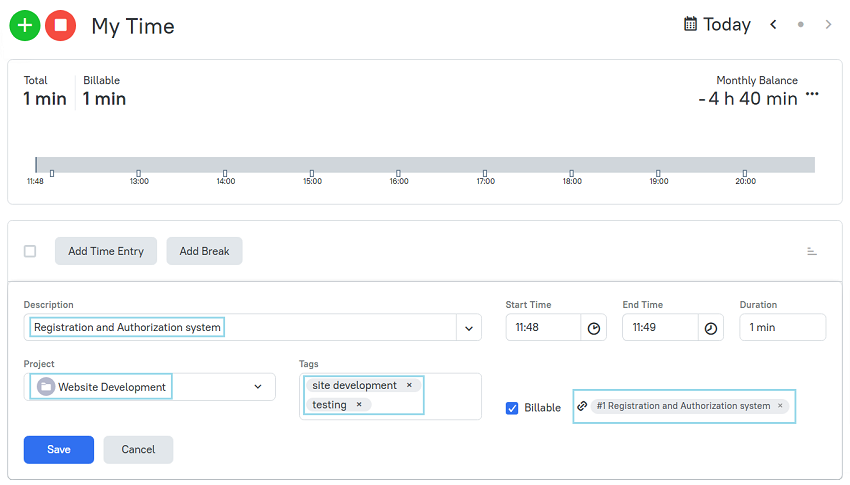
3. Edit time entry, if necessary
A time entry with an external task can be edited. You can edit the name of the task and change a project without losing a link to the Azure DevOps work item.
To disassociate the task from the Azure DevOps Services work item, click the cross icon next to the task name in the bottom right corner of the time entry editor.
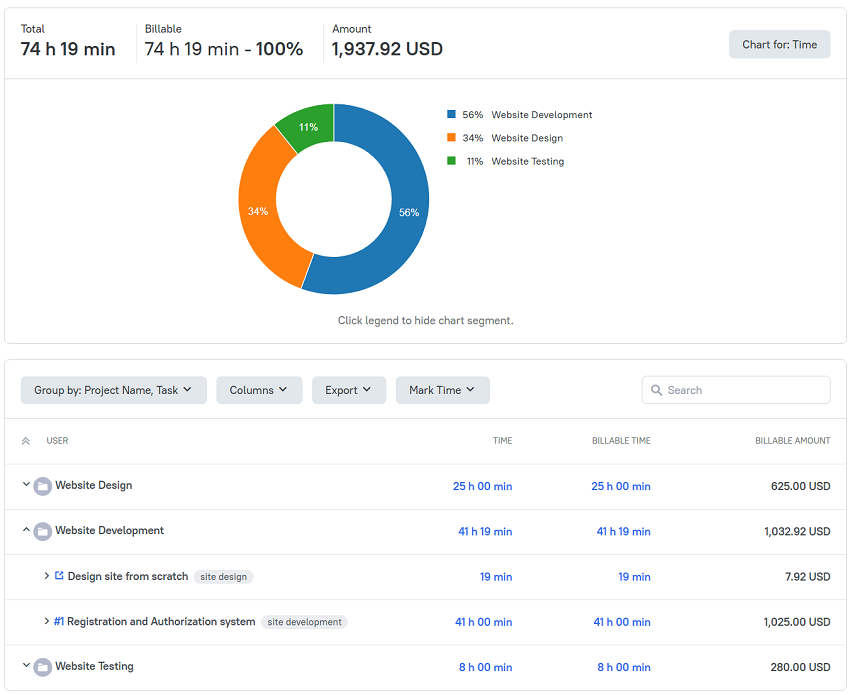
4. View a time report
Reports show the time from different external systems, as well as the time entered manually in TMetric.
TMetric is a great time tracking web app that allows you to control your time and stay productive throughout the day!
Frequently Asked Questions
Make time work for you!
Powered by ![]() A software vendor with 29 years of experience.
A software vendor with 29 years of experience.