How to Download and Install Desktop App on Mac
In this topic, you will learn how to install and set up the TMetric desktop client on macOS. The TMetric desktop client allows users to track time, manage tasks, and monitor their productivity on their Mac computer.
To download and install a desktop client on a Mac
1. Download the latest macOS installer from the TMetric site.
2. Go to the Downloads folder and click the downloaded file.
3. In the dialog that opens, move TMetric Desktop to the Applications folder.
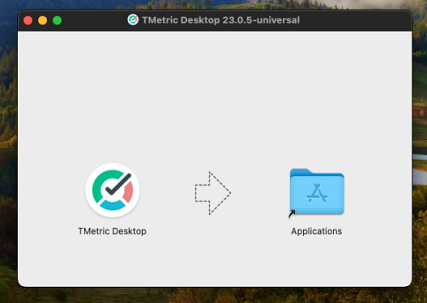
4. Go to the Applications folder and double-click TMetric Desktop to open it.
5. You will see a message from Mac indicating that you need to grant permission to open TMetric on your system.
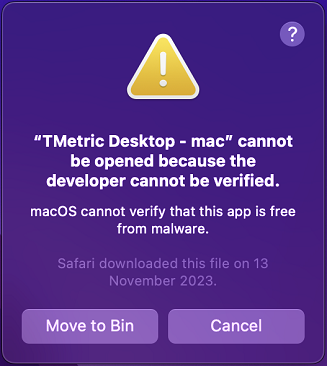
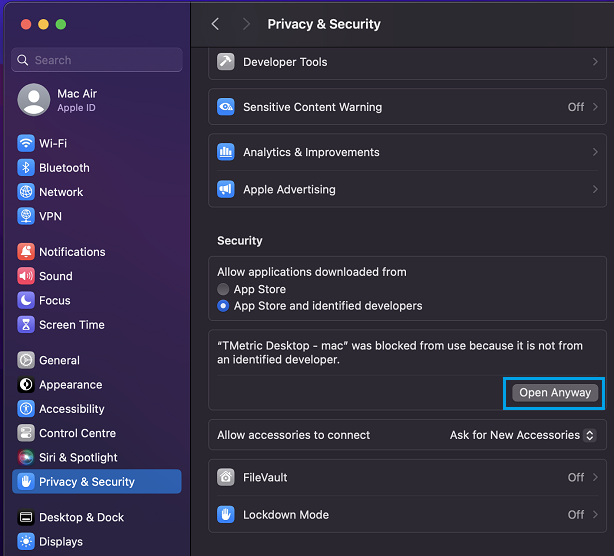
6. To change permissions, click the Apple icon and then System Settings.
7. On the Privacy & Security tab, find the security message to open TMetric, click the Open Anyway button, and use your password.
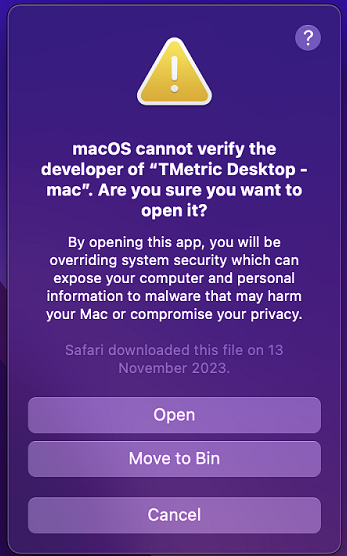
8. Go back to the Applications folder and click the TMetric icon.
9. In the dialog that appears, click the Open button.
10. The Login dialog opens, where you can either log in with your TMetric account or create a new one by clicking the Sign Up button.
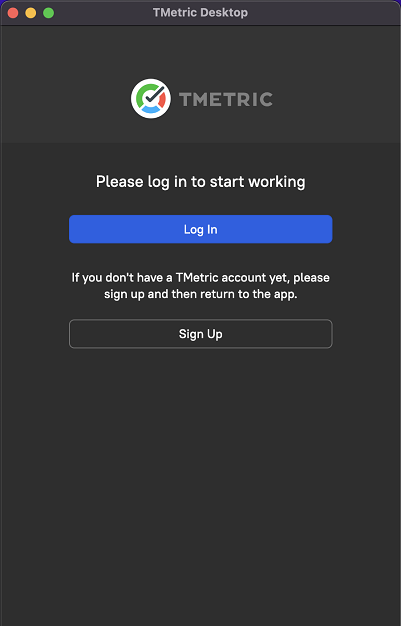
Once you've done, you can start tracking the time you spend on different tasks on your Mac.
Screenshot capture and activity tracking
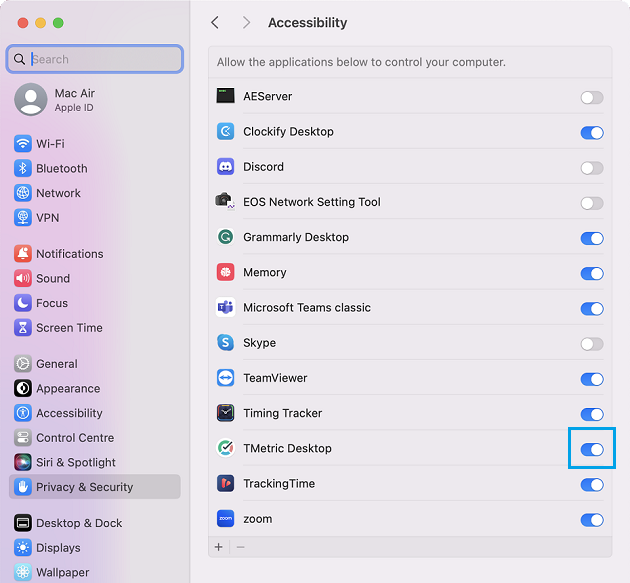
TMetric Desktop also allows you to track user activity and record screenshots on macOS when needed. For this, you should grant it the accessibility permissions.
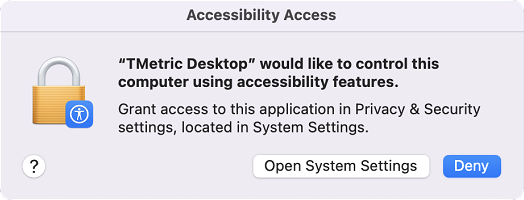
Once logged in, you will see the permission dialog box. Click the Open System Settings button to continue.
On the Privacy & Security tab, find TMetric Desktop and turn the toggle on.
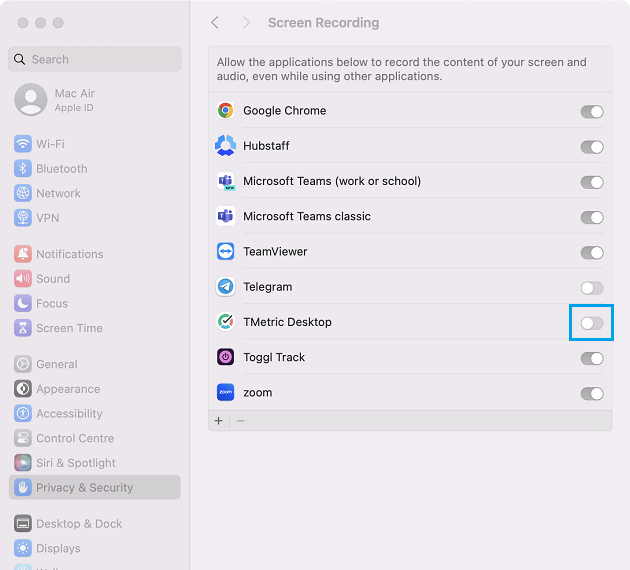
To allow TMetric to take screenshots of your screen, please grant our app access. Follow these steps to do so:
1. Go to System Settings and click the Privacy & Security tab.
2. Click Screen Recording on the right.
3. Turn screen recording on for TMetric.
When both the Accessibility and Screen recording permissions are granted to TMetric, it will record the following information: activity levels, apps and sites, details and screenshots (taking into account that they are enabled in the workspace settings). Though, you can change these options in the workspace whenever you need.
Didn’t find what you were looking for?
If you didn't find what you were looking for, you can make a support request or email us to [email protected]. We'll be glad to help you personally.