ClickUp Time Tracking in One Click
Track time spent on tasks and projects in ClickUp. Get insights from reports and measure productivity. Add billable rates and create invoices. Capture screenshots and control team attendance. Manage work schedules and time off. Set up effective workflows and never lose a single minute of your precious time!
Add Timer Button to ClickUp tasks
Complete these three simple steps to enable time tracking in ClickUp.
It takes no more than 3 minutes to set up.
Browser add-on for TMetric that allows one-click time tracking for popular Web apps

Features
No Manual Input Required
- Timer button is integrated in each ClickUp task
- It takes a single click to start the timer
- No need to stop before switching to another task

Backlinks to ClickUp from TMetric
- Each time entry contains a backlink to a ClickUp task
- ClickUp projects are mapped to TMetric projects
- ClickUp task names are automatically assigned to time entries

Powerful Time Reports
- See the time of your team in one place
- Group, sort, and filter reports
- Export time reports and invoice your clients

How to Use Time Tracking In ClickUp
1. Find timer button in ClickUp task
Click a required task from a list in your project. A dialog window opens where you can view and edit the contents of the task. Near the date of task creation, you can see the TMetric Start timer button.
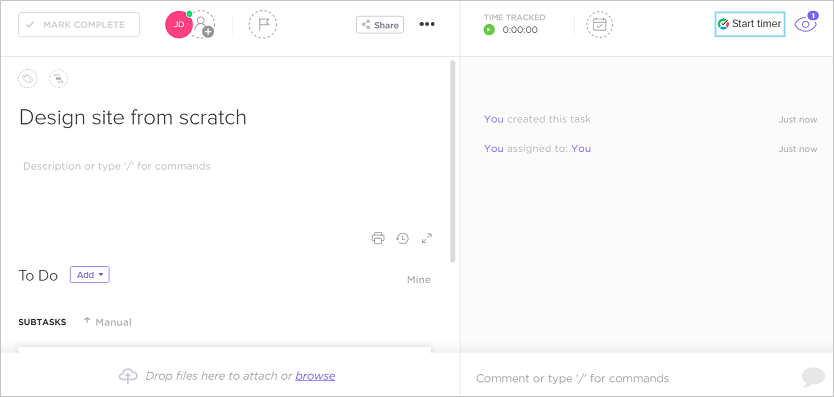
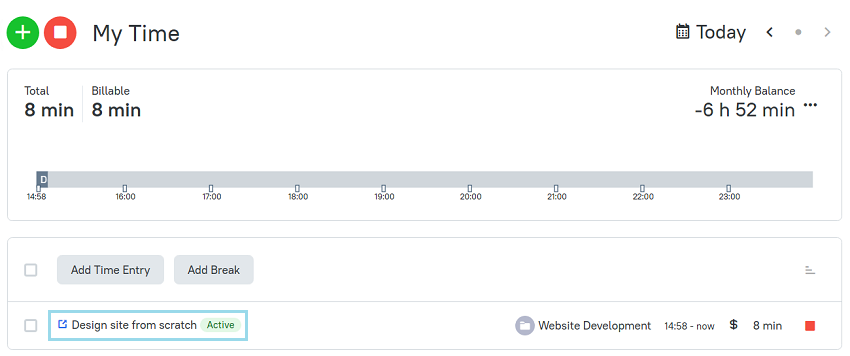
2. Start timer on a task
Click the Start timer button and TMetric will start recording your ClickUp working time. Notice that the Start timer button changes to the Stop timer button and displays the time spent on the task.
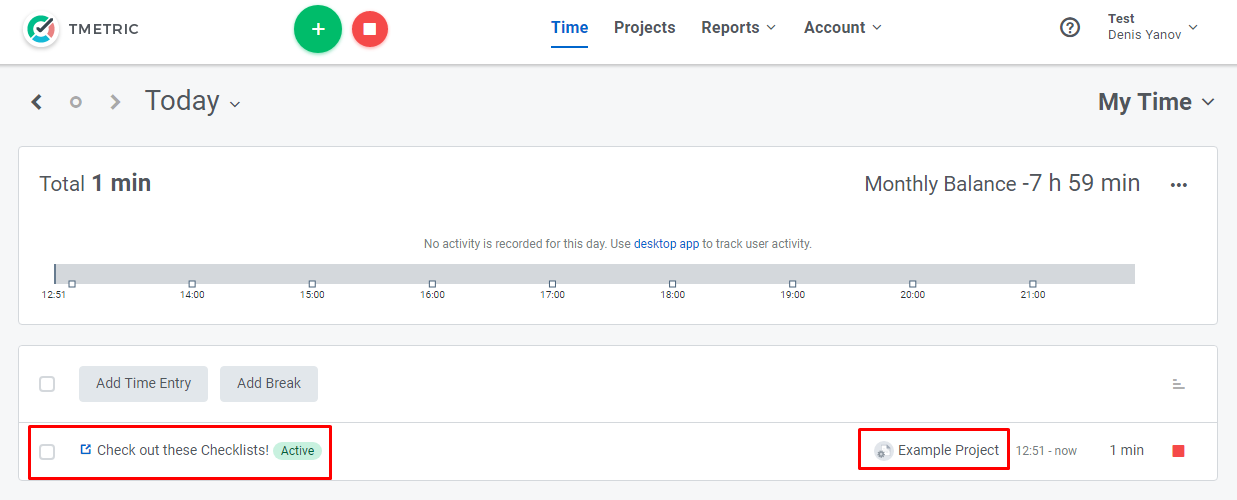
If you are the workspace owner or assigned admin in TMetric and start the timer for the first time, TMetric pulls out from ClickUp and adds to your TMetric workspace:
- task name
- task ID
- project name
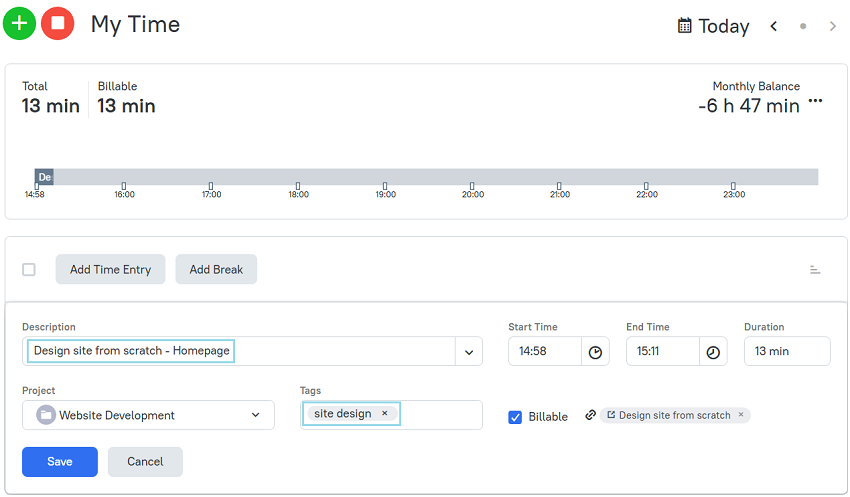
The corresponding time entry appears on the Time page in the TMetric web app. You can easily navigate back to the ClickUp task simply by clicking the link icon next to the task name.
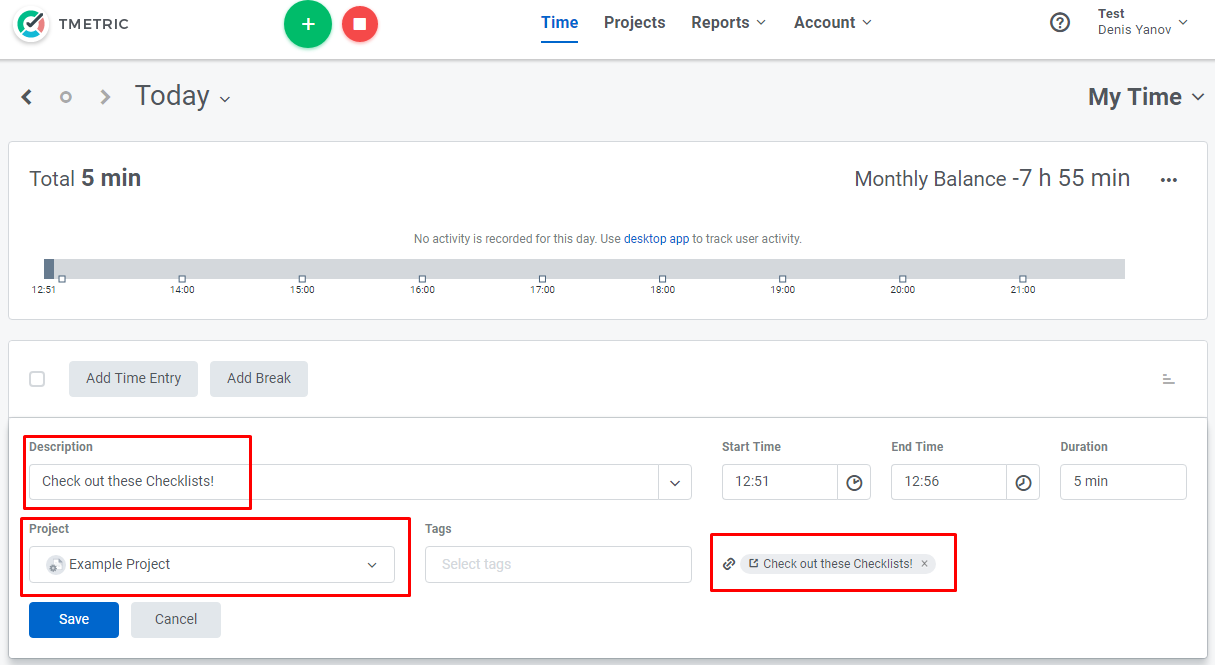
3. Edit time entry, if necessary
A time entry with an external task can be edited. You can edit the name of the task and change a project without losing a link to the ClickUp task.
To disassociate the TMetric task from the ClickUp task, click the cross icon next to the task name in the bottom right corner of the time entry editor.
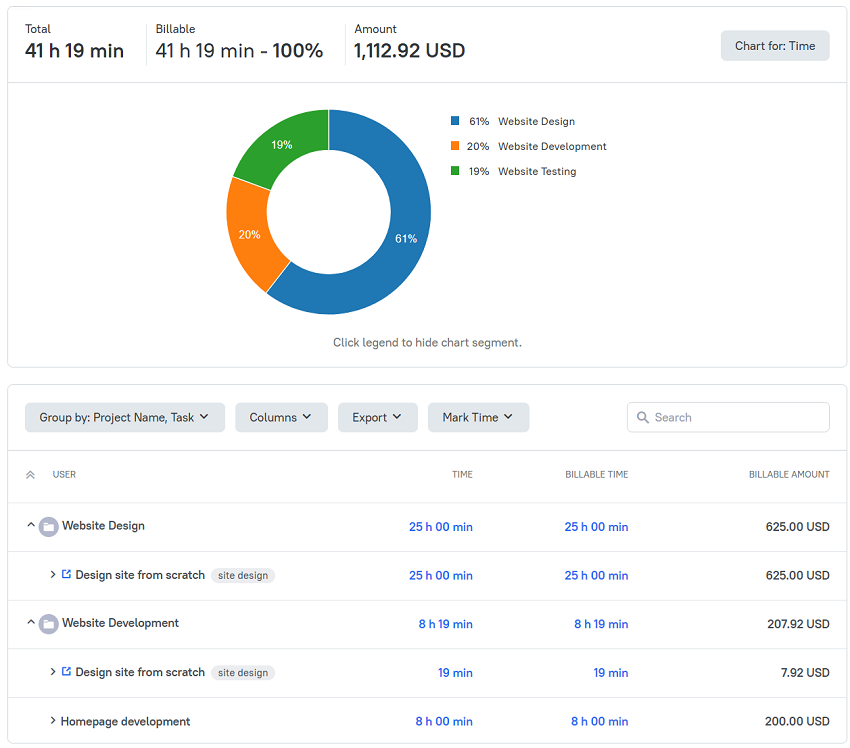
4. View a time report
Reports show the time from different external systems, including the ClickUp time tracking report as well as the time entered manually in TMetric.
5. Configure time synchronization with ClickUp
TMetric supports fast integration with ClickUp, one-click time tracking and flexible time synchronization. You work on your tasks in ClickUp, seamlessly track time with TMetric, and sync it for further reporting and invoicing.
Once you connect TMetric with ClickUp, the time logged in TMetric will be synchronized automatically to ClickUp every hour. There is also a possibility to run an instant synchronization by clicking the Sync Time Now button.
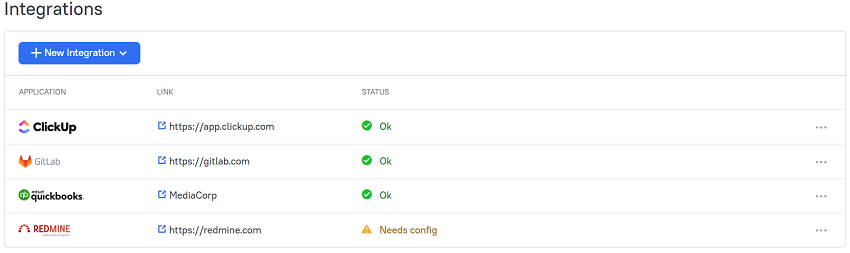
You can manage the ClickUp integration on the Integrations page of the TMetric app. In particular, you can:
- View log to see the results of synchronization
- Edit the integration settings
- Delete an integration. When you delete an integration, all time entries associated with this integration will be unassigned from the relevant ClickUp instance.
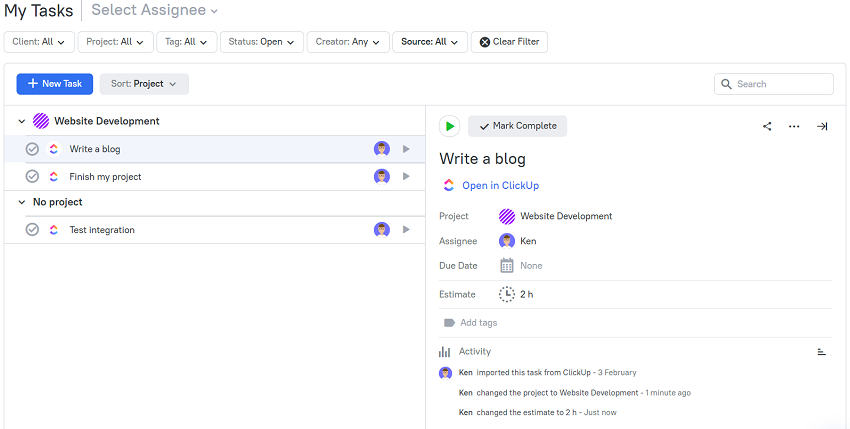
6. Manage external tasks right in TMetric
When you start tracking time in ClickUp, an external task gets created on the Tasks tab in TMetric where you can easily manage it. For any task, you can configure ClickUp time estimates and deadlines to help you predict your project completion more accurately.
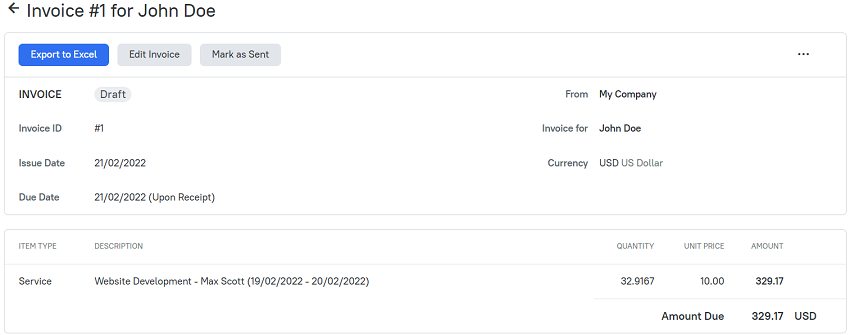
7. Create invoices to bill your clients
Once you finish working on a project, you need to invoice your client. TMetric allows you to manage this process in two ways: either to mark the time as invoiced or create an invoice and send it to your client to get paid on time.
8. TMetric widget for ClickUp
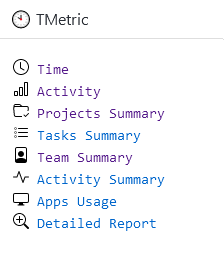
For your convenience, it's possible to embed a TMetric widget directly into your ClickUp Dashboard. This will allow you to get access to the most important time tracking and reporting data in one place. Although this is an optional step, only for those who want to get a widget with links to the TMetric pages.
The TMetric widget shows the links to the Time and Activity pages, as well as different reports. You will need just one click to see and create accountability.
To embed a widget in ClickUp:
1. On the left side menu, click Dashboards, and then My Private Dashboards.
2. Select an existing or create a new Dashboard (+ button).
3. Click the "+ Add Widget" button at the top right corner.
4. Click Embed -> Custom Embed.
5. In the Name field, enter: 🕑 TMetric.
6. Select Embed HTML, paste the following code, specifying your workspace id in it:
<!DOCTYPE html>
<head>
<script src="https://app.tmetric.com/widget/script.js"></script>
</head>
<script>

const id = 0; // <- SPECIFY WORKSPACE ID HERE

// remove row if you don't need a link
add("Time", `tracker/${id}/`, "clock");
add("Activity", `activity/${id}/`, "bar-chart");
add("Projects Summary", `reports/${id}/projects?range=thismonth`, "folder-check");
add("Tasks Summary", `reports/${id}/tasks?range=thismonth&groupby=user`, "list-task");
add("Team Summary", `reports/${id}/staff?range=thismonth`, "file-person");
add("Activity Summary", `reports/${id}/activity?range=thismonth`, "activity");
add("Apps Usage", `reports/${id}/apps?range=thismonth&groupby=user`, "display");
add("Detailed Report", `reports/${id}/detailed?range=thismonth&groupby=user,project`, "zoom-in");

</script>
7. Click Save.
8. Change the size and position as you wish.
TMetric is a great time tracking web app that allows you to control your time and stay productive throughout the day!

Make time work for you!
Powered by ![]() A software vendor with 29 years of experience.
A software vendor with 29 years of experience.